Recovering a Linux server
After downloading the Bare Metal Restore image file and obtaining a disaster recovery code for a Linux server, you can recover the server to hardware or to a virtual machine. The destination server must have:
-
Hardware that is compatible with the source server, including CPUs, bus, adapters, firmware and storage.
-
The same number of disks or more disks than the source server.
-
Hard drives that are the same size or larger than drives on the source server.
To recover a Linux server:
-
Create a bootable USB device, CD or DVD from the Bare Metal Restore image file that you downloaded in Downloading the BMR image file and obtaining a disaster recovery code.
-
Choose a destination system where the source (backed up) server will be recovered.
-
Boot the destination system from the bootable device created in Step 1, and then do one of the following:
-
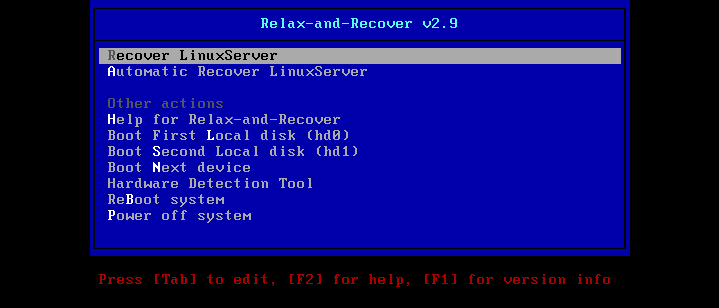
If the Relax-and-Recover screen appears, select RecoversourceServerName and then press Enter. This screen appears if the source server is BIOS-based.
Do not select Automatic Recover sourceServerName or the system will not start successfully.
-
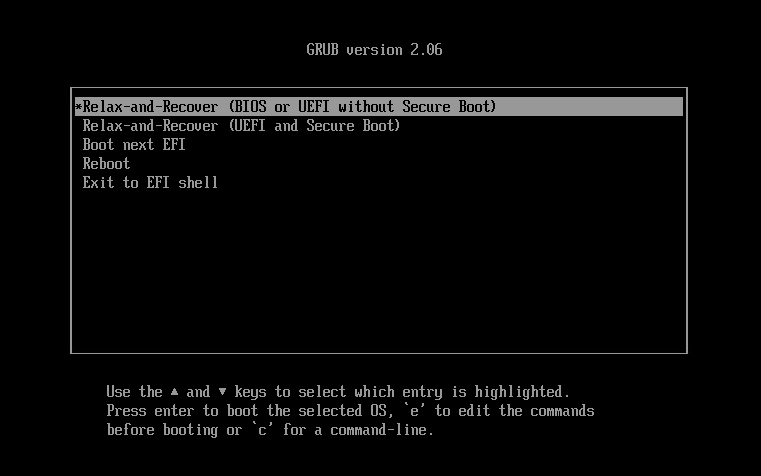
If the following screen appears, select Relax-and-Recover (BIOS or UEFI without Secure Boot) and then press Enter. This screen appears if the source server is UEFI-based.
-
-
When the login prompt appears, enter:
rootNote: If a login prompt does not appear, press Enter.
-
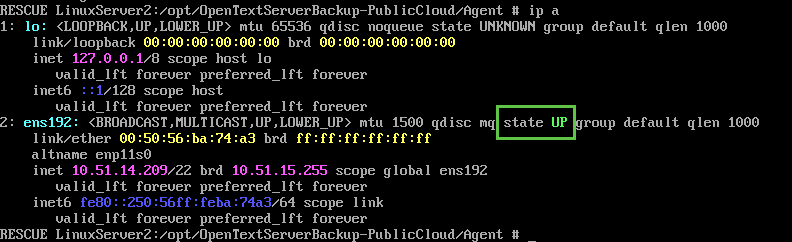
Run the following command to determine whether there is a network connection:
ip a
If the network interface state is UP (as shown in the following example), continue to the next step. If the network interface state is DOWN, go to Setting up a network connection for a Linux server recovery.
-
Enter the following command:
./bmragent
- At the Recovery Code prompt, enter the recovery code you obtained in Downloading the BMR image file and obtaining a disaster recovery code.
-
At the Password prompt, enter the agent password.
The system validates the password and loads available restore points. A restore point is a backup that started on a specific day at a specific time.
Note: The time of each restore point is shown in the real local time of the device where the agent is installed. Using the real local time ensures that restore point times are always in chronological order, even if the system time changed on the device.
-
On the Restore Points screen, press the up and down arrow keys to highlight the backup to restore, and then press Enter.
The system loads information about the restore point, including volumes that were backed up from the server.
IMPORTANT: If you have modified the server's disk layout or LVM volume configuration, we highly recommend selecting the latest restore point for the recovery. After the server is recovered, you can recover files and folders from earlier restore points. See Recovering Linux files and folders.
-
Do one of the following:
-
To recover the server from the selected restore point, press Enter. The screen shows information about disk mapping from the source server to the destination server.
-
To choose a different restore point, press ESC and return to step 9.
-
-
At each prompt, press Enter to select the default option.
Note: Prompts that appear depend on the server configurations. For example, if the destination server is larger than the source server, a Confirm the recreated disk layout prompt appears. If the destination server has a larger disk than the backed-up server, a Confirm restored config files are OK prompt appears.
Note: If an error occurs at this stage of the recovery, please go to http://relax-and-recover.org/support/ for Relax-and-Recover support.
The recovery begins. The time required to complete the recovery depends on the size of the server and environmental factors such as network performance.
When the recovery is finished, a Completed the bare metal restore message appears, followed by the RESCUE prompt.

-
Restart the server.
Depending on the source server platform and configuration, the server could restart once or twice automatically.
-
Log in to the recovered server with credentials from the source (backed up) server, and verify that the server is working.
Note: If you ran a disaster recovery, the recovered server replaces the original device in the Management Console and backups continue automatically on the new server. If you ran a test recovery, the server is recovered but does not replace the original device in the Management Console.