Configuring Web Traffic Filtering
You can configure web filtering by using several methods:
- Deploying DWP to Windows Computers — Deploying the Desktop Web Proxy (DWP) to Windows computers — If your network is comprised mostly of Windows-based (Windows 7 and above) or Mac-based systems, DWP offers the best method for quickly authenticating both on-site and remote systems. However, DWP cannot be installed on mobile phones, tablets, or Windows RT devices.
- Modifying LAN Settings in Users’ Browsers — This is an ideal method for networks that include a mixture of Windows-based systems and other types of operating systems and devices. It's also ideal if you do not use your own gateway caching proxy or do any firewall redirections.
Note: For some types of network setups, you can use the Management Portal to configure network-level filtering. With this method, you can enter the range of IP addresses in your network or upload the email addresses of all users. For more information, contact Technical Support or see the WSS Admin Guide.
Deploying DWP to Windows Computers
You can install the Desktop Web Proxy (DWP) individually on each Windows workstation by using the msi installation package, a Group Policy Object editor, or another type of batch installation process. The .msi installation package for DWP is available from the Management Portal, on the Resources>Downloads tab.
To download and install DWP:
- In a browser, enter the following URL:
The Log In Window displays.

- Log in using your WSS email address and password and click the Log in button.

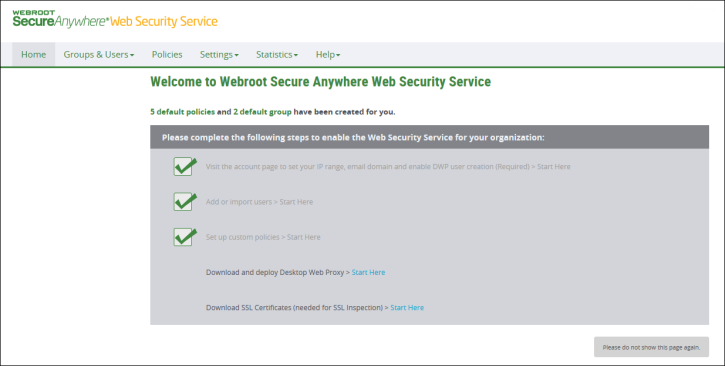
- The first time you log in, the system displays the WSS Welcome window, with a list of steps that you need to complete to enable WSS for your organization. When you've completed the list, click the Please do not show this page again button.
- From the Help tab, select Downloads.
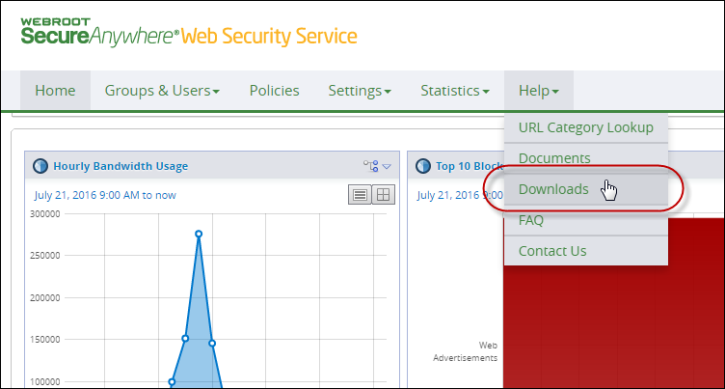
The Downloads tab displays.
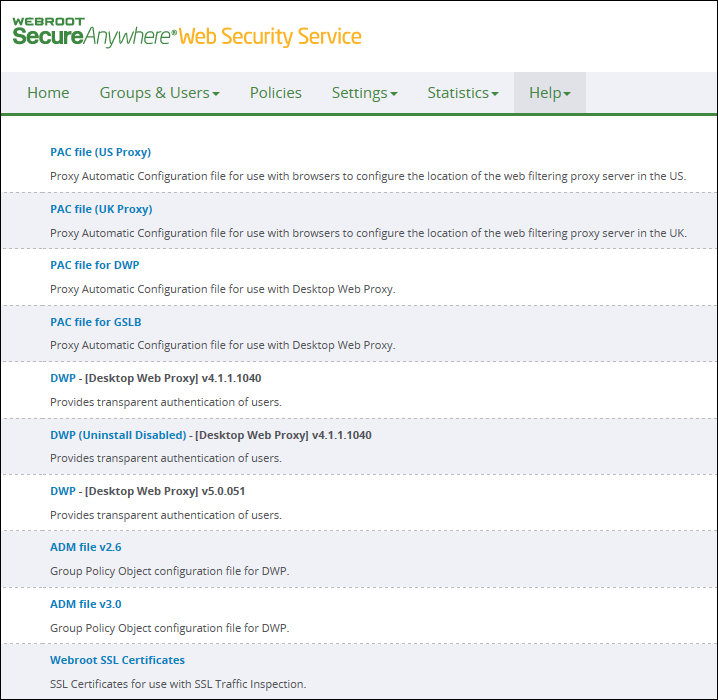
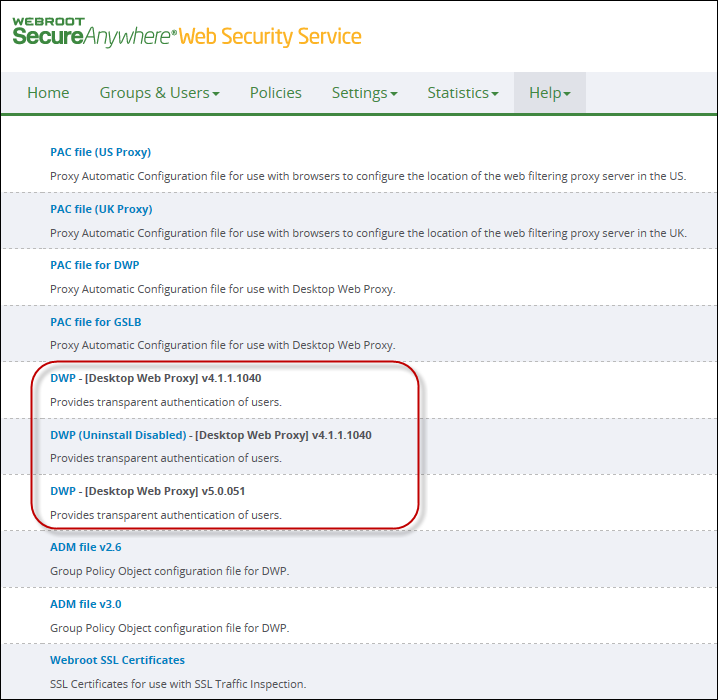
- Click one of the DWP files to save it.
- Install and extract the DWP file on an individual Windows workstation or use a silent install to deploy DWP to multiple workstations. After you deploy DWP, the DWP icon displays in the system tray of each computer.

For information on how to deploy DWP, see the Desktop Web Proxy Configuration Guide.
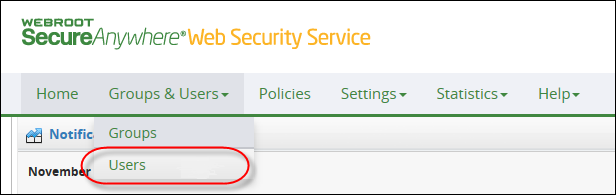
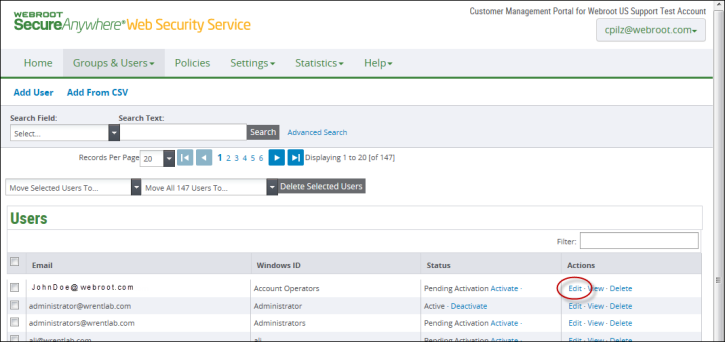
- From the Groups & Users tab, select Users, and make sure all the users appear in the table.
- To change information for a user, in the Actions column, click Edit.
All users are assigned to the Default User Group and Best Practices policy. For more information on how to change the policy settings and assignments, see Adding and Modifying Policy Settings.
Modifying LAN Settings in Users’ Browsers
You can configure web filtering by entering a proxy URL and port in the browser for each workstation or other network device. The port number you enter depends on your configuration.
To check which port number to enter:
- In a browser, enter the following URL:
The Log In window displays.

- Log in using your WSS email address and password and click the Log in button.
- From the Groups & Users tab, select Groups.
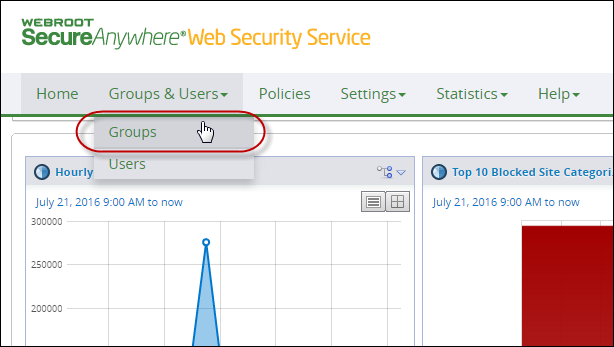
The Groups tab displays.
- Click the DWP Configuration subtab.
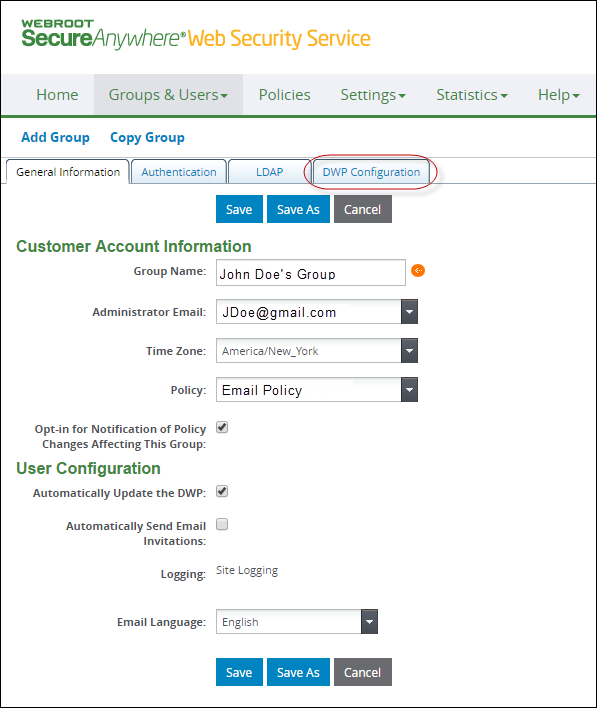
The DWP Configuration tab displays.
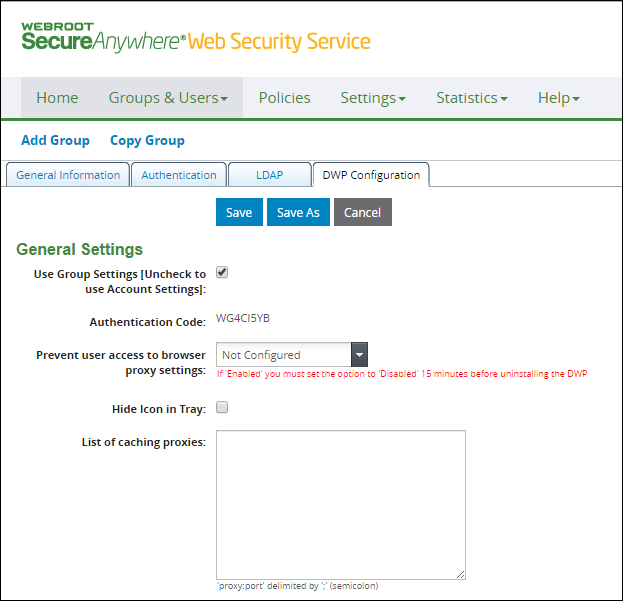
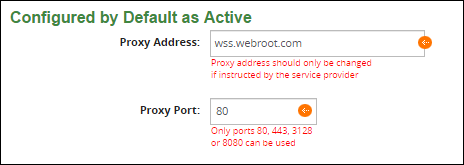
- Scroll down to the Configured by Default as Active area, which is located on the bottom third of the page. The number shown in the Proxy Port field is the number you must enter in LAN settings.
To configure browser-level web filtering:
- From each workstation or other network device, open the browser and locate the LAN settings.
- For the URL, enter: wss.webroot.com.
- For the port number, enter one of the following:
- 312
- 880
- 8080
What you enter must match the number in the Proxy Port field of the Groups > DWP Configuration tab.
- For more detailed logs in the Management Portal, you can identify users by entering their email addresses. Use any of the following methods:
- Synchronize with the LDAP directory.
- Import users from a remote file.
- Enter user information manually in the Users' tab.
For more information about entering user information, see the WSS Admin Guide.
All users are assigned to the Default User Group and Best Practices policy. You can add more user-based groups and policies, if needed. To change the policy settings and assignments, see Adding and Modifying Policy Settings.

