Managing Consoles
When you first registered an account, SecureAnywhere organized your managed devices into a single console. A console is a collection of one or more devices running a Webroot product. If needed, you can create multiple consoles, which can be convenient if you are managing devices for different people and different purposes.
For example, a small business owner might want to create consoles for home and business. The home console could include the laptops and mobiles devices of family members. The business console could include laptops and mobile devices of employees. By creating these separate consoles, the administrator has simplified views into the devices used by family or by employees.
This topic contains the following procedures:
Note: A single console is sufficient for most people.
Changing Default Console Names
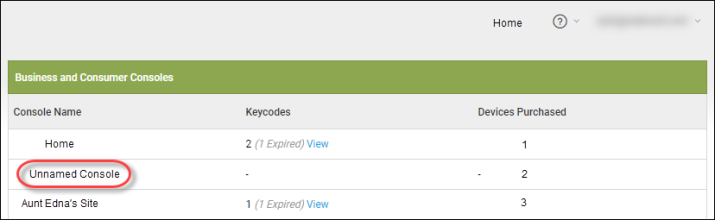
After you first create an account, SecureAnywhere automatically organizes your devices into a default console called Unnamed Console. If needed, you can change it to a more meaningful name.
To change the default console name:
- Open your browser and go to my.webrootanywhere.com. For more information, see Logging into your account.
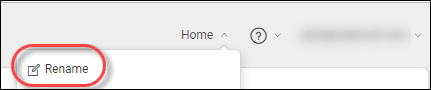
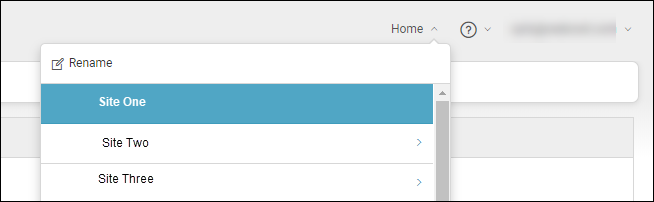
- From the Console Name drop-down menu, select Rename.
-
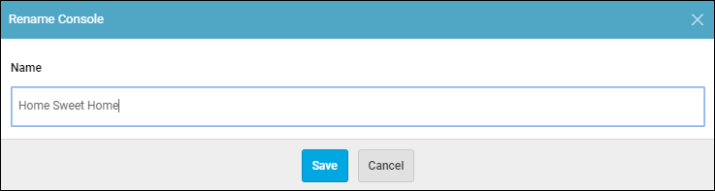
In the Name field in the Renamed Console window, enter a new name for the console, using alphanumeric characters and spaces only.
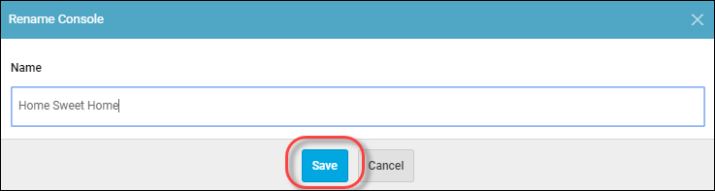
- Click the Save button.
Adding Consoles
If you manage multiple devices for friends or employees, you might want to organize them into separate consoles.
To add a console:
- Obtain a new keycode from Webroot for the devices that will be managed in the new console. Install SecureAnywhere on those PCs with that new keycode.
- Open your browser to the SecureAnywhere website at my.webrootanywhere.com.
- Instead of logging in to your account, click the Sign up now button.
The system displays the same registration page you used to create your account.
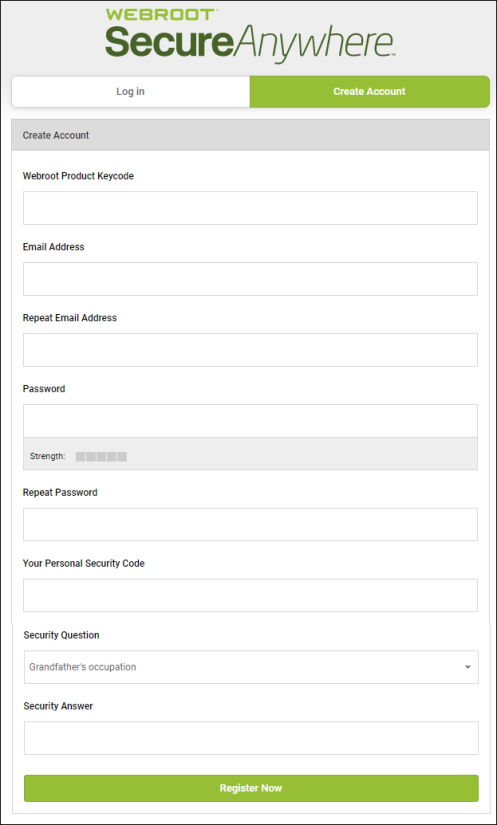
- In the Webroot Product Keycode field, enter the new keycode.
-
In the remaining fields, enter your existing account information for the email address, password, security code, and security questions and answers.
FIELD DESCRIPTION Email Address
Enter your email address, which will also be used for your login name. Your account activation confirmation will be sent to this address.
Enter a minimum of nine characters. Your password must contain at least 6 alphabetic characters and 3 numeric characters. Your password can be longer than the required 9 characters. It can include special characters, except for angle brackets: < and >. Your password is case sensitive.
As you type, the Strength meter shows how secure your password is. For optimum security, you should make your password as strong as possible.
Enter a word or number, which will be used for an extra security step after you enter the password during login. Use a code that is easy to remember, using a minimum of 6 characters.
Every time you log in, you must also enter two random characters of this code. For example, if your code is 123456 and it prompts you for the fourth and sixth character, you would enter 4 and 6. Your Personal Security Code is case sensitive.
Select a question from the drop-down list. If you later forget the details of your login, you need to provide the answer to this question to retrieve the information.
Type an answer to your security question. The Security Answer is case-sensitive.
-
Click the Register Now button.
Because you already created an account using your email address, SecureAnywhere recognizes your information. The system prompts you to create a new console for the device.

- Click the Select button in the left panel to add a new console.
SecureAnywhere creates the console and prompts you to log in.
- Log in with your account information.
A panel similar to the following example displays.
- Select the new Unnamed Console. You can rename it later, as described above.
Your new console shows any device that use the keycode you entered.
Switching Between Consoles
To switch between two consoles:
- When you are inside of a console, from the Console Name drop-down menu, select the console you want to switch to.
The console you selected displays.